
TEDDYBEAR TUESDAY
- blonde2brunette

- Sep 23, 2014
- 4 min read

With September soon coming to an end, I can’t help but reminisce on how quickly this year has flown by. Exactly last year at this time, I was being showered by my beautiful family and friends with my son’s baby shower. My shower was a little more intimate being it was my second time around, but none the less, myself, along with my mom and sister went all out with every detail for the party. Since we decided to go with an outside venue from our home this time and had a more private affair, we were able to incorporate even more homemade details and displays.
These DIY projects get us really excited and give us the opportunity to explore all of our ideas that we end up constantly talking about. I don’t know about you, but I have a tiny addiction to Pinterest! I lie…it’s actually a HUGE addiction! My sister got me hooked! It has literally taken over my house, my parties, my cooking/baking, holidays, the way I style my house….and the list goes on! Those of you who know and love this site, understand my obsession!
As soon as I found out I was having a boy, I started thinking about themes for his baby shower. For me, with every party I plan, I first decide on the theme and then the invitations so that I know what direction to go with for the rest of the party. With this baby shower, I wanted something soft and sweet, but yet still said “little boy”…then it hit me, teddy bears!!! As soon as I mentioned the theme to my mom and sister, we immediately “went to work” and couldn’t stop brainstorming.
Being that this theme was for a sweet baby boy, I wanted a very soft rustic setting with vintage touches in the details. When thinking about center pieces, most people immediately think of flowers, but along with flowers, my genius mother had the awesome idea for making handmade bear displays. At first I was worried because of timing, but it was something she had seen before at a party.

Here’s what we did for the teddy bear displays:
We bought a bunch of vintage looking teddy bears from Toys R Us and then went to Michael’s where we found wooden bases and mini cream colored crocheted doily’s. We then painted the bases blue and glued the bears down on top of the doily’s. To accent the different tones of blue, we tied different ribbons to each bear. My 1st born daughter is attached to her blankie, aka her “mimi”, so we thought it would be a nice personal touch to add “mimi’s” to each bear. We headed over to Joann Fabrics and bought different fabric. We cut out little squares with those jagged scissors and sewed them onto the hands of the bears. The final pieces on the bear displays were glued on vintage wooden blocks different wooden toys and cars. Each display was different and we ended up raffling them off at the end of the shower. My mom’s idea was such a beautiful focal point of the party and a total labor of love! I saved one that now sits on my son’s dresser as a reminder of that special day!


Aside from the bear displays, we spent a lot of time at Michael’s buying burlap, twine, mason jars, thin wooden stumps, crates, mini haystacks and metal wagons, wooden stands, raffia and more!! My sister is an amazing baker and I wanted simple and delicious cakes that would satisfy everyone’s sweet tooth, aside from the other treats we ordered. With the materials we bought, we created a mock dessert table at home incorporating that rustic feel with the all of the wood and burplap. We got lucky at Pier One and found beautiful rustic animal ornaments that we placed around the cake and treats. For the dessert table, I wanted that wow factor, so I found a vendor on Etsy who handmade a long fabric garland and a banner with my son’s name on it. She was soo sweet! She would send me pictures of the fabrics she was planning to use and I felt a part of the entire creative process. The banner with my son’s name now hangs over his crib. I also plan to use it again for his first birthday party and will definitely save it for him and his future family one day! Sorry…had to throw that little note in there. It was just so beautiful and completely complimented the shower.


Here are some other quick DIY projects we did:
Glued twine to all of the different sized mason jars that held flowers
At the end of each burlap runner, we tied them with lots of raffia to complete the look
Used some of the metal wagons for floral pieces and then filled the others with styrofoam and moss to be able to stick in the chocolate teddybear lollipops we had made
Used the thin pieces of bark as bases for the cakes and stands
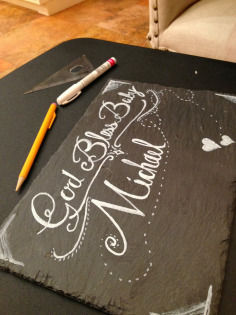
Wrote the cake flavors on small chalkboard slates
Wrapped the letters, B-A-B-Y, in cream colored yarn and hot glued different shades of blue, yellow and cream buttons
Painted all of the mini wooden crates that held desserts or that were props
Aside from having a local florist create the main centerpieces, we went to a floral supply store and bought all different types of wild flowers for the rest of the room.


I hope these pictures make you as happy as they make me! This has been one of my top favorite parties to plan and decorate so far because we were soo hands on! With only a few weeks away until my son, Mikey’s, 1st birthday party, I am once again back in that party planning mode and “pinning” away to bring all of my ideas to life! Until then, wish me luck as I finalize all of my DIY projects!
Follow me and the rest of the B2B girls on Pinterest! We would love to hear your party decorating/styling tips!
Lots of love,
Sylvia


P.S. HEY MIAMI LOCALS, If you would like the information on the vendors (some don’t have social media/public numbers) we used for Mikey’s Baby Shower, please message us!


Comments